1. Glue each miniature picture of your students onto a piece of sturdy paper leaving a space at the bottom for their name and a distinct symbol.
2. Make sure the design on the back of each card is the same. I printed out a miniature school logo to go on the back of each memory card.
3 .Write each student’s name under their picture with a distinct symbol/color to help the international partners identify which is their partner. This is especially helpful for students who do not read yet. I chose several symbols such as spiral, heart, star, diamond, happy face, sun, moon and then repeated those designs in different colors to create one symbol/color combination that was distinct for each student.
4. Laminate each card. Then cut out each card leaving a small margin of laminate to seal the card.
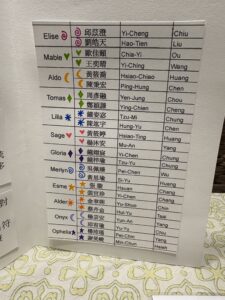
5. Create a name list with multiple columns to include: a symbol, your students’ names, the international students’ names (I used Chinese writing hoping the students would recognize their names as well as the English writing). I typed up directions for memory and google translated them, and printed them out with the student name list.
Here is an example of my name list to connect my students with their buddies